
The Manage Workspaces tab allows for the creation and management of workspaces on your site. Workspaces are for grouping sets of files together. You could create workspaces for projects, customers or clients, sub-contractors, vendors, inter-office departments or even offices in different locations just to name a few. Workspaces can be thought of as "master folders" or "portals".
Workspaces List
When you first click on the Manage Workspaces tab you will see a list of all current workspaces, including their Created, Modified, and Last Access dates, along with Storage Used by each workspace. Clicking on the column names allows you to sort by that criteria. Clicking again will reverse the order of the sort.
Clicking the Show User link below the workspace name will open a window and display all users belonging to that workspace. Remember: Admins belong to all workspaces by default so their names will not appear in this window.
Actions Menu
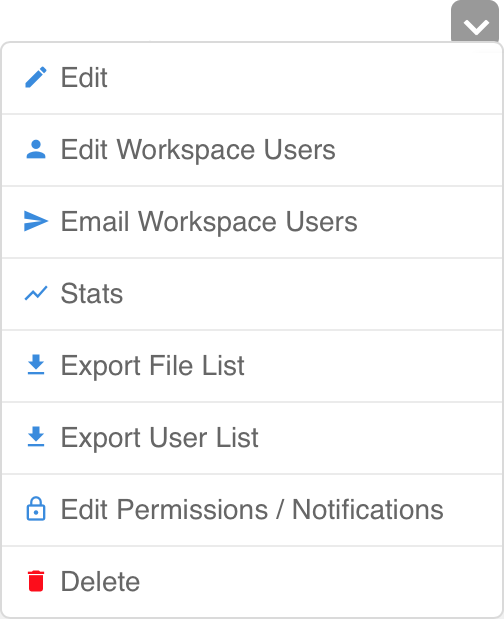 To the right of each workspace is the Actions Menu, displayed as a gray box with a downward-facing arrow. Rolling over the Actions menu will display a list of actions you can perform on that workspace.
Edit – This will open the Edit Workspace screen that allows you to edit the properties of the workspace, such as name, attached users, etc. You can also edit a workspace by clicking directly on the workspace name.
Edit Workspace Users – This allows you to directly edit which users belong to the workspace without the need to enter the Edit Workspace window. To add users, begin typing their name (or group name) into the field. Anything matching what you have typed so far will appear in a list below the field. Click on a name to add it to the list. If you wish to remove a user, click Remove below their name. Clicking Make Sub-admin will set that user as a sub-admin of the workspace. When finished, click the blue Set Workspace Users button.
Email Workspace Users – This provides a means to email all users of the workspace in one easy step. Simply enter a subject and message and, if desired, click Send a copy to myself. When complete, click Send Email.
Stats – Upon selecting, a window will provide the five most recent uploads, downloads and sends from the workspace as well as links at the bottom to allow you to export CSV files for viewing in Excel.
Export File List and Export User List – These will let you download a CSV file for viewing information on files and users, such as a list of all files and folders within the workspace or viewing all users that belong to the workspace.
Edit Permissions/Notifications – This will override permissions and/or notifications for any user while in this workspace. If the user has custom permissions and/or notifications already set for this workspace, those will override these settings. To return permissions or notifications to their default state, select Delete Workspace Override Permissions (or Notifications). Click Update when finished.
Delete – This allows you to delete the workspace. A warning screen will appear to allow for confirmation of the deletion.
Search Workspaces
At the top-right corner of the list is the Search Workspaces field which allows you to quickly find a workspace you're looking for. As you begin to type the name of a workspace in the field, any workspaces with names that match what you have typed so far will appear in a list below the search field. Clicking one of these names will take you directly to the Edit Workspace screen. Clicking the Search button will keep you on the Workspace List window but display only those workspaces that match what you've typed.
Export All Workspaces as CSV
This link provides a means to download a CSV file (which you can open in Excel) that provides details and information about all of the workspaces such as user members, permission overrides, last access date/time, and total number of uploads, downloads and sends. The location the file downloads to depends on your browser settings, but will often be your "Downloads" folder or your desktop.
Workspace Filters
This allows you to filter the visible workspaces according to which users belong to those workspaces. By default the dropdown menu is set to "All Users" which then displays all workspaces. Clicking the menu and selecting one of the (non-admin) users from the list will then display which workspaces that user belongs to. Clicking the "View workspaces with no users" link will display those workspaces in which no user has been assigned.
Comments
0 comments
Please sign in to leave a comment.