
The Manage Users tab allows for the creation and management of users on your site. A user is defined as someone who can log into the site. A non-user is typically someone who is sent files from the site by a user (or uploads files to the site through the FileDrop) but cannot log in.
Users List
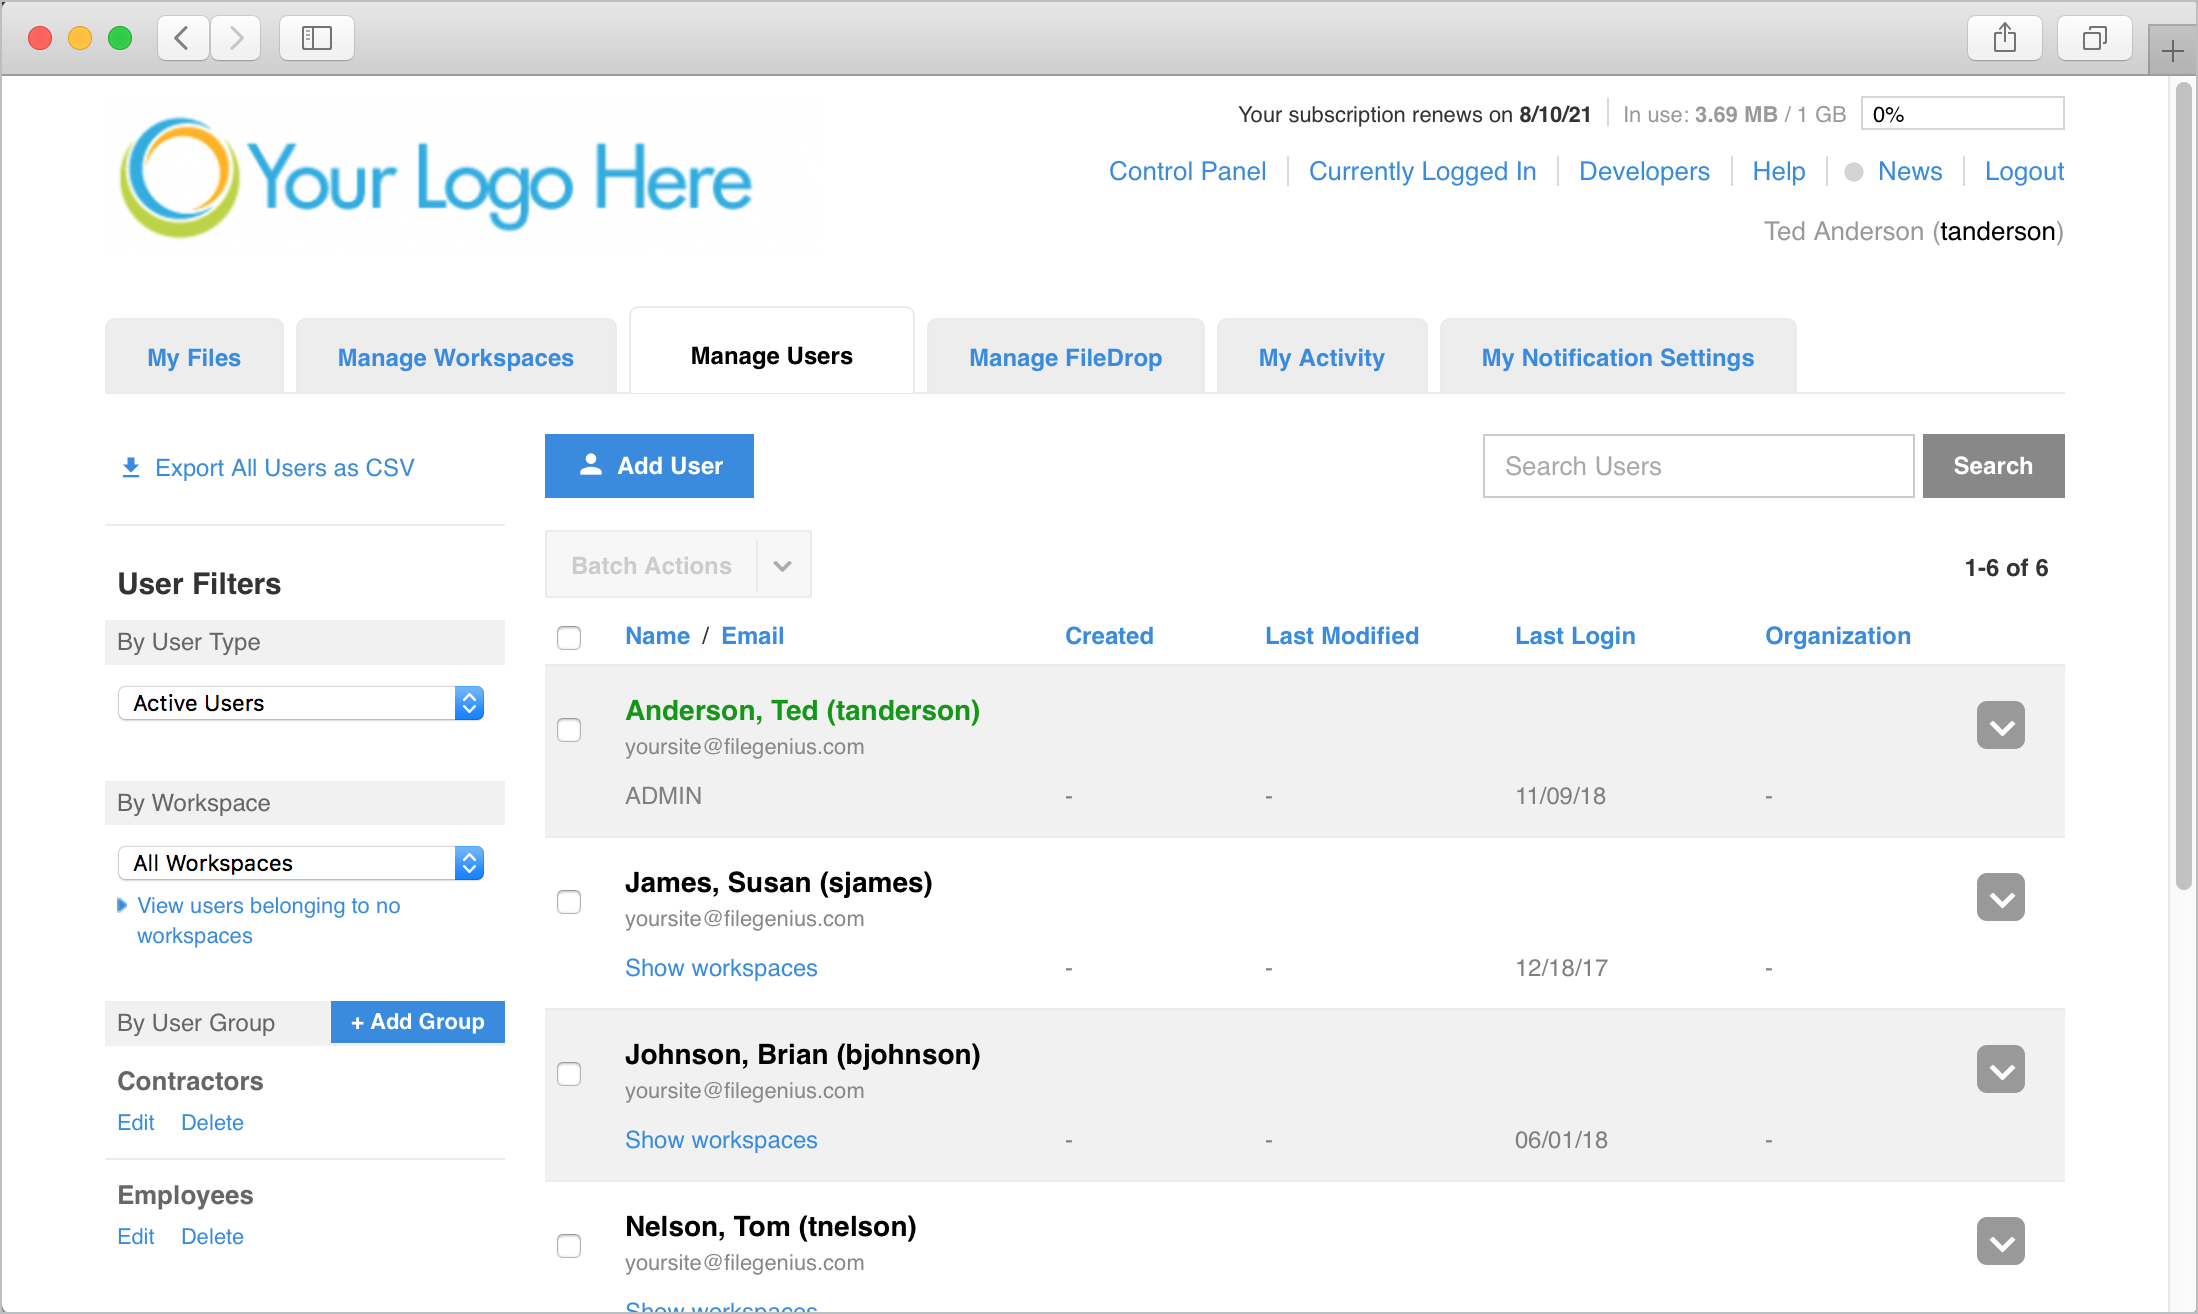
When you first click on the Manage Users tab you will see a list of all current users, including their Name/Email, Created, Last Modified, Last Login date and Organization. Clicking on the column names allows you to sort by that criteria. Clicking again will reverse the order of the sort.
Clicking the Show Workspaces link below the user's name will open a window and display all workspaces that user belongs to. Remember: Admins belong to all workspaces by default so their names will not have a Show Workspaces link below them.
Actions Menu
 To the right of each user is the Actions Menu, displayed as a gray box with a downward-facing arrow. Rolling over the Actions menu will display a list of actions you can perform on that user.
Edit – This will open the Edit User screen that allows you to edit the properties of the user, such as name, assigned workspaces, etc. You can also edit a user by clicking directly on the user's name.
Email User – This provides a means to email the user directly from the site. Simply enter a subject and message and, if desired, click "Send a copy to myself". When complete, click Send Email.
Add to Workspaces – This allows you to directly edit which workspaces the user belongs to without the need to enter the Edit User window. To add workspaces, begin typing a workspace name into the field. Anything matching what you have typed so far will appear in a list below the field. Click on a name to add it to the list. If you wish to remove a workspace, click Remove below its name. Clicking Make Sub-Admin will set that user as a sub-admin of the workspace. When finished, click the blue Set User Workspaces button.
Reset Password – Selecting this allows you reset the user's password. They will receive a notification email with a new temporary password and upon logging in will be required the change the temporary password to a permanent one.
Add to User Groups – If there are any existing user groups (as shown in the area to the left of the user list) selecting this feature will let you add the user to one or more user groups without editing the user groups individually. See more info below.
Stats – Upon selecting, a window will provide the five most recent uploads, downloads and sends from by the user as well as the date and time of the 10 most recent logins. Links at the bottom of the columns allow you to export CSV files for viewing in Excel.
Deactivate – Deactivating a user prevents them from logging into the site but keeps them in the system and retains their workspace associations and permissions. They can then be reactivated later with a single click, eliminating the need to recreate the user from scratch. When a user is reactivated, the system will send them an email notification with a new temporary password which they must use to log in with (and will be required to change).
Delete – This allows you to delete the user. A warning screen will appear to allow for confirmation of the deletion.
User Filters
By User Type – Selecting the dropdown menu will allow you to choose which types of users you wish to see; active users, inactive users, users who have never logged in, admins-only, and non-admins only. When selected, users matching the selected filter will appear in the list on the right.
By Workspace – The dropdown menu will display all workspaces currently on the site. Selecting a workspace will display those users who currently belong to that workspace. Admins are not displayed as they belong to all workspaces. The "View users belonging to no workspaces" link below the dropdown menu will display any users who do not belong to at least one workspace. Users not belonging to any workspaces cannot log into the site.
By User Group – User Groups can be used to group users together for easy addition to or removal from workspaces. By adding a group to a workspace, all users within the User Group gain access to the workspace without having to add them individually. By adding a user to a group, the user instantly has access to all workspaces that the group has been added to.
To create a new User Group, click the "+ Add Group" button, enter a name for the group and select the users that should be part of that group. Click "Add User Group" to finish. The group can be edited or deleted by using the corresponding links below the group name.
Search Users
At the top-right corner of the list is the Search Users field which allows you to quickly find a user you're looking for. As you begin to type the name, username or organization of a user in the field, any users matching what you have typed so far will appear in a list below the search field. Clicking one of these names will take you directly to the Edit User screen. Clicking the Search button will keep you on the User List window but display only those users that match what you've typed.
Export All Users as CSV
Clicking this link will download a CSV file that can be opened in Excel or other spreadsheet application. The file will provide information for all users on the site, including which workspaces they belong to, their permission settings, last login, and more.
Comments
0 comments
Article is closed for comments.